There can be scenarios when your computer is unable to connect to the wired home networks. Misconfigured network settings or incompatible wires may result in such an issue. This guide will provide you with some helpful methods to troubleshoot wired home network on Windows 10 for HP computers.
Note: Make sure you test your network connection after performing each troubleshooting method for fixing the wired home network issue on Windows 10.
Fix 1: Complete the network connection checklist to troubleshoot wired network
Most issues related to the network get resolved if you perform basic troubleshooting steps. You can use the following checklist to troubleshoot issues with wired networks on Windows 10:
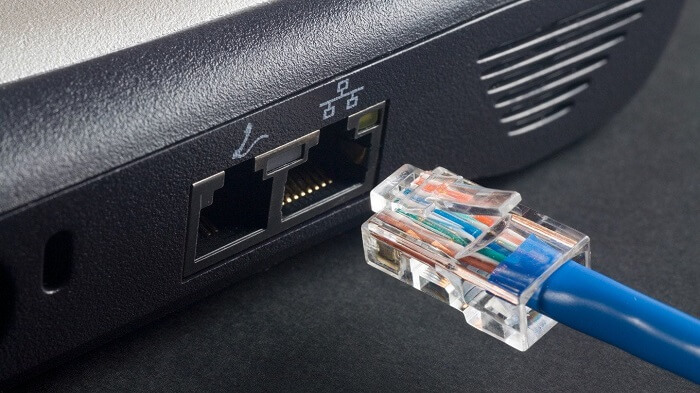
- Make sure you check all the network wires and cables. Disconnected or loose wires or cables prevent internet access and network connection. You can check the following connection:
- Network cable from a modem to the router or network hub.
- Network cable from your network hub to the RJ-45 network port on a PC.
- Check the network cable between the two computers.
- Also, check the lights on a network hub. Depending on the location of the light, you can find out the issue with the connection.
- If you want to connect to another PC on the network, make sure that the PC is powered on.
- Configure the firewall settings on all the PCs on the network. Incorrect firewall settings may prevent network access.
After you perform these steps, you can try connecting to the network. If you don’t find any issues while connecting with the network, you no longer have to troubleshoot the wired network problem. But, if you still encounter any problems with the network, you can check the network status.
Fix 2: Verify the network status in the network and sharing center
By checking the network status, you can figure out whether or not your computer is connected to the network. If it is not connected to the network, you can check the cables and the hardware to troubleshoot wired network. Otherwise set up a new network manually by entering the username and password.
Here are the detailed steps to check and connect your computer to the network:
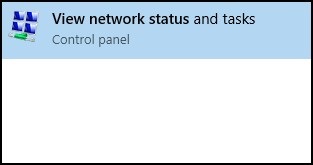
- Go to the search box on the taskbar and type in View Network Status.
- Then, click on the View Network Status and Tasks option from the results.
- After this, go to the View your active networks section located on the top.
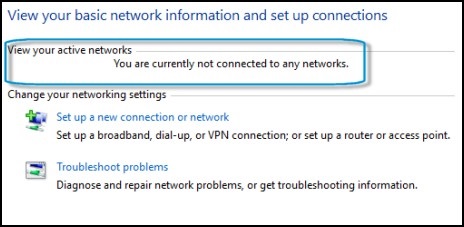
- If you have not connected your computer to the network yet, you will see the prompt for the same.
- In that case, you are required to check the hardware and cables.
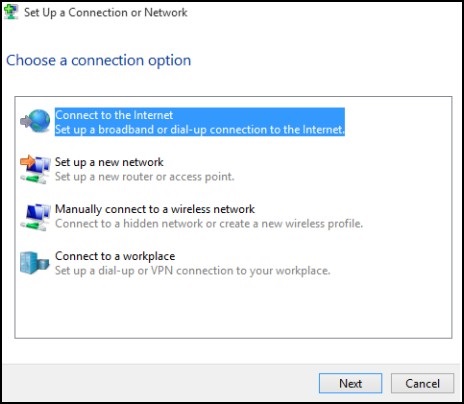
- If your computer still does not connect to the network, click the Set up a new network or connection. Then, select the Connect to the Internet option.
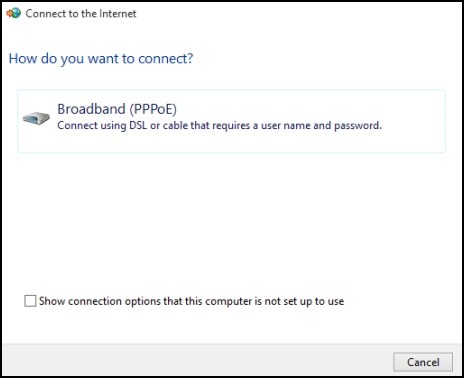
- After this, click on the Broadband (PPPoE) option.
- Once done, type in your username and password for a network connection.
- Later, you can give a name to your connection and click the Connect button.
How to troubleshoot wireless network on Windows 10 for HP computers
If you find no issues connecting with the internet, you don’t have to do anything further. In case you are facing any problems even after performing this method. Then you can adjust advanced sharing options to troubleshoot wired home network issues.
Fix 3: Set advanced sharing options to troubleshoot wired networks
By changing the advanced sharing options, you can get rid of wired home network issues. This can be done from the Taskbar. All you have to do is check the network status and change the advanced sharing options by enabling the network discovery option.
Perform the following instructions to set advanced sharing options on Windows 10 PC:
- Search for View Network Status through the search bar on the taskbar.
- Then, click on the View network status and tasks option from the results.
- Click the Change advanced sharing settings option.
- Click on the Turn on network discovery option.
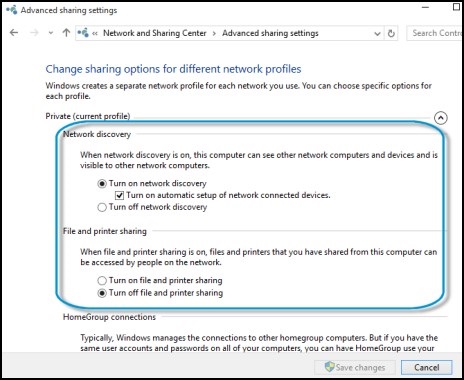
- Select the Turn on file and printer sharing option.
- Hit the Save Changes button.
After making these changes, connect your Windows system to the network. If it does not resolve the issue, move on to the next troubleshooting method.
Fix 4: Run diagnostic and troubleshooting tools for wired networks
Windows 10 has an inbuilt network troubleshooter and network diagnostic tool. Both tools let you recognize the network issue and provide a relevant solution to fix it.
Run the Windows network diagnostics tool
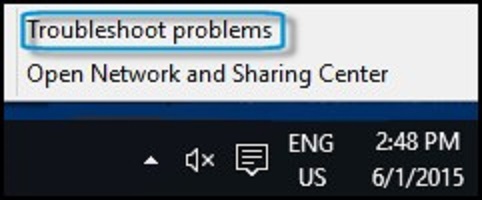
- Navigate through the notification area and click right on the Network Connection icon.
- Then, select Troubleshoot Problems with the wired network option. In doing so, the Windows Network Diagnostics tool detects the problem.
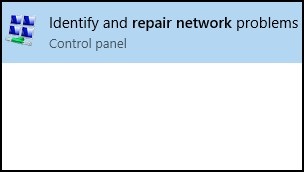
- In case the Network Connection is not available in the notification area, you can find it manually:
- Go to the search bar on the taskbar.
- Type in Repair Network.
- Click the Identify and Repair Network Problems option. This will help you diagnose the problem.
Run the Windows network and internet troubleshooter
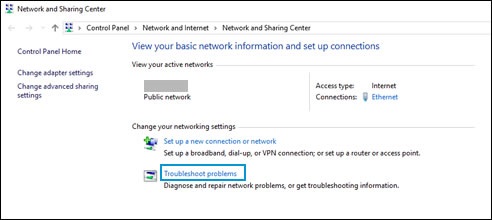
- Go to the notification area and click right on the View Network Status icon.
- Then, click View Network Status and Tasks from the results.
- Select the Troubleshoot Problems option.
- Choose the item that is relevant to your network issue.
- Hit the Next button.
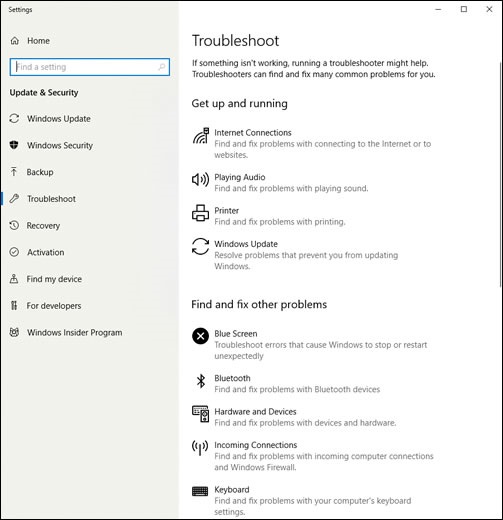
- Pursue the on-screen instructions to inspect the issue.
Once you diagnose the problem and fix it, you can try connecting to the wired network. If this is still creating conflicts, you can reinstall the network adapter software.
Fix 5: Reinstall the Network adapter in the device manager
A problem with the network adapter may cause network issues. By reinstalling the network adapter software in the Windows Device Manager, you can troubleshoot the wired network problem.
- In the Windows search bar, type Device Manager.
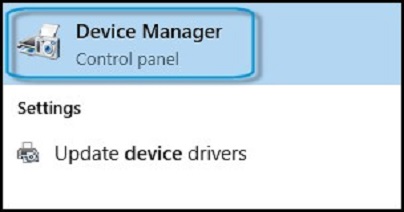
- Once it opens, click on the Network Adapters category.
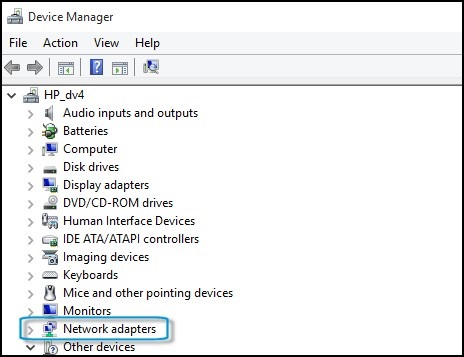
- Choose the name of a network adapter.
- Hit the Uninstall button.
- Click on the Confirm Device Uninstall screen.
- Click the OK button.
- After successfully removing the network adapter, you can restart your computer. The Windows computer will start reinstalling the device driver software.
After your system restarts and finishes the procedure of device driver installation, you can connect to the internet. If it is still creating issues with the wired network connection, make sure your driver software is updated to the latest version.
Fix 6: Check and update the drivers to troubleshoot the wired network
To check the driver updates, you can visit the HP website. Note that you can get drivers through Windows Update only if you have a device with Windows 10 in S mode.
- Visit the Software and Driver Downloads page.
- Then, you can proceed with product identification by clicking on the Desktop or Laptop.
- Type in the model name of your system. You can also enter the serial number in the dedicated field and hit the Submit button.
- At this stage, you will see a software results page with the default operating system marked. If you want to change your operating system, you can hit the Change, select the version, and click on the Change button to apply changes.
Note: If you don’t find the desired operating system in the list, it indicates HP has no drivers for that operating system. In this scenario, you can select another way to download the driver.
- When you see the list of software and drivers, select the category name and hit the Download button.
- Pursue the instructions to complete the driver installation.
This should be noted that when you see the list of software and drivers, you will see multiple components to download. You can check which component your system already has in the Device Manager. Based on the requirement, you can download the component and troubleshoot the wired network.
Fix 7: Use Microsoft system restore
To troubleshoot the wired network or internet connection, you can use Microsoft System Restore. This tool uses automatically-saved information which helps in restoring the computer to a particular point in time.
Using Microsoft System Restore, you can restore your Windows computer to a time when the internet was working fine.
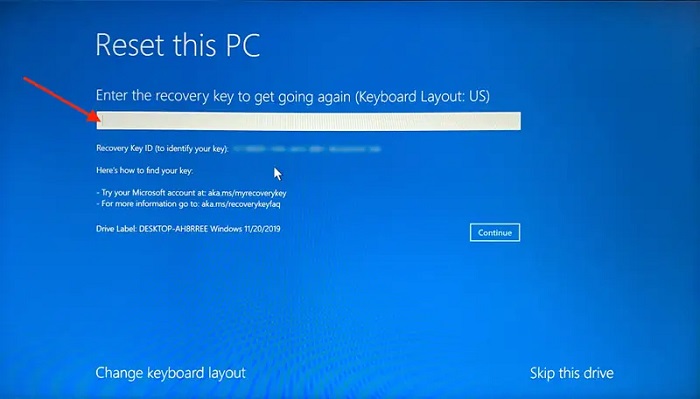
Fix 8: Reset the computer to troubleshoot the wired network
Windows 10 has a reset HP Computer feature that helps you to reinstall the operating system without having to lose any customization and personal data. However, it is still recommended to back up your personal files on the computer.
To reset Windows 10 and troubleshoot the wired network, you can perform the following steps:
- Search for Recovery Options through the Windows search bar.
- When the Recovery window opens, click the Get Started button under Reset this PC section.
- Continue following the on-screen prompts to reset your PC.
The process may take a few minutes. Once the computer is reset, you can restore the personal files on your computer.
Winding up on wired network troubleshooting guide
If your Windows 10 device is not connecting to the network, this may be a case of an outdated driver, incorrect firewall settings, and others. Here, we have provided simple methods to troubleshoot wired home network on Windows 10 for HP computers.