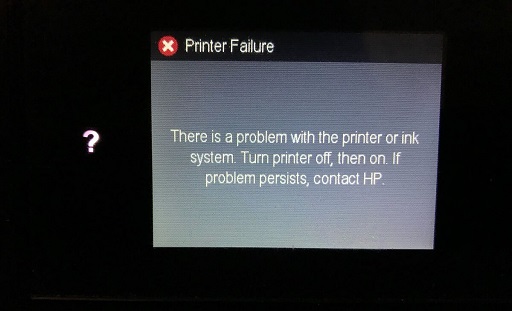
This guide provides easy solutions if your HP printer not printing black ink accurately or black ink not working properly. In some instances, your HP printer functions properly, however, does not print black ink. As a result, your HP printer prints blank pages or text with a light black color.
Recommendation: Connect with a technician via live chat because they know the various causes behind this problem very precisely and provide the most appropriate solution to fix it.
Key reasons behind HP printer not printing blank ink
- Not using genuine black ink cartridges.
- Dirty printheads.
- Defective or empty black ink cartridges.
- Improper paper settings.
- Outdated firmware driver.
Solutions to fix if HP printer not printing black or black ink not working
We have ten possible solutions to fix the HP printer not printing black ink or black ink not working for Envy, Deskjet, Officejet Pro, Photosmart, and Laserjet series printers. Please follow the step-by-step guide to resolve the HP printer problem.
Solution 1: Examine the ink level of the black color cartridge, then replace it if empty
First, check the ink level if your HP printer not printing black ink. If it is empty, you need to replace the ink cartridges immediately. Besides that, you should make sure that there is no issue with the alignment. If there is, fix that right away to solve the problem.
Step-1 Examine the ink level of the cartridges
- First, load the paper stack into the input tray.
- Next, you need to touch the button (-) next to the setup icon located at the lower-left corner of the control panel.
- Now tap on the right arrow key to select tools and touch on OK.
- If none of the cartridges are low on ink. Then there is no need to replace any. Now jump to solution number 2.
- If black or any other cartridges are low on ink. Then you need to purchase a new one and replace it. Now continue with step 2.
Note:- HP provides estimates for ink-level warnings or indicators only for planning purposes. The indicator is there to prevent any print delays. There is no need to replace the cartridges until you find, that the print quality is unacceptable (the printer not printing appropriate black color ink).
Step-2 Replace the empty or low ink cartridges
If your HP printer not printing black or black ink not working, try the automated printhead cleaning process. This method is effortless as you don’t have to clean the printer manually. Follow the stepwise guide to run the automated printhead cleaning.
- Firstly ensure that an appropriate paper stack is loaded inside the tray.
- Now press the power button to turn ON the printer.
- Next, you need to open the cartridge access door. Wait until the printer is in an idle state or silent state.
- Now you need to extract the black ink cartridge from its slot.

- Next, remove the new cartridge from its packaging, then pull the tab to remove the plastic tape.
Note:- You need to avoid touching the copper-color metal contacts or ink nozzles. If you do so, it leads to clogs, ink system failure, a bad electrical connection, black ink not printing, or black ink not working on the HP printer.
- You have to hold the cartridge with the nozzles toward the printer. Then insert it into the black cartridge slot. Ensure the icon on the cartridges and slot matches.
- Now press the cartridge in the forward direction, until it snaps to its place.
- Finally, close the cartridge access door.
Step-3 Align your HP printer to fix black ink not printing or working issue
Not using genuine ink cartridges may lead to several problems. If your HP printer not printing black ink, this is probably because you are using false ink cartridges. Therefore, you should ensure that the ink system is totally genuine so you don’t face any errors related to ink color.
- Ensure that your printer is ON and the paper stack is loaded in the tray.
- Next, you need to touch the button (-) next to the setup icon located at the lower-left corner of the control panel.
- Now tap on the right arrow key to select tools and touch on OK.
- Again, touch the right arrow key button to Select the align printer and then tap on OK.
- Now your printer will print an alignment page.
- Lift the printer lid.
- Next, you have to place the alignment page on the right front corner of the scanner glass. Make sure that the printed side of the page is in the down direction.
- Moreover, you can see the guide next to the scanner glass to load the alignment page.
- Now close the lid and press OK to complete the alignment process.
- You must wait until the printer scans the alignment page and completes the alignment process.
Now try to print a test page. If still you got stuck, why is my HP printer not printing black ink? Then follow the next solution to fix the problem.
Solution 2: Clean the printhead with an automated tool
If your HP printer not printing black ink or black ink not working or printing light grey color. Then try the automated printhead cleaning. Follow the stepwise guide to run the automated printhead cleaning.
- First of all, load the paper inside the input tray.
- Next, you need to touch the button (-) next to the setup icon located at the lower-left corner of the control panel.
- Now touch on the right arrow key to select tools and tap on OK.
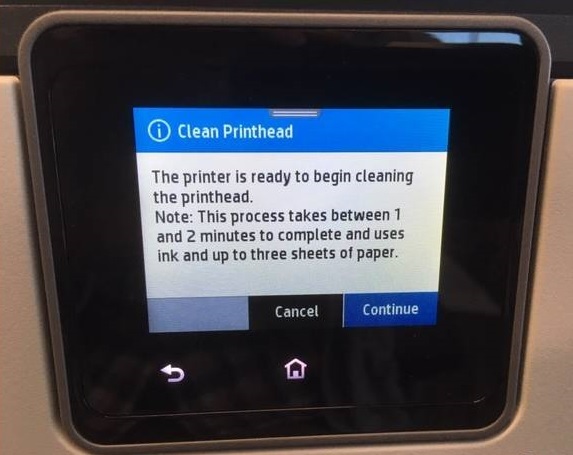
- Again, touch the right arrow key button to Select the clean printhead and then tap on OK. Now the printer will start the cleaning process.
Note:- Don’t worry about the mechanical noises during the cleanup process it is normal. After finishing the cleanup, your printer will print a test page.
- Now you have to check the print quality on the printhead test page. If your HP printer not printing black color correctly. Then you need to follow the guidance to run the second level of the cleaning process. You might be required to clean the printhead numerous times to revive optimal print quality.
Note:- You need to turn off your printer always, to bypass any issue that requires cleaning.
Solution 3: Please use original HP cartridges to fix the printer not printing black
- HP recommends users use genuine HP ink cartridges or toner supplies for HP Deskjet, Officejet Pro, Envy, Photosmart, and Laserjet series printers to avoid black ink not printing or black ink not working.
- HP does not guarantee the reliability or quality of the non-HP or refilled ink cartridges.
- If you are not using genuine ink cartridges then the solutions above will not help you out.
- To check the authenticity of your cartridges you need to click on the link mentioned. Check authenticity of cartridges
Solution 4: Run the Windows Troubleshooter to solve printer is not printing black ink
Windows 10 provides an in-built printer troubleshooter to scan and resolve the issues in the best possible ways. If you are bothered by the HP printer not printing black ink error, running the printer troubleshooter may help you to resolve the problem.
Please note this method can only be implemented by Windows users. Continue to follow the instructions if you are eligible to perform this method or else skip to the next method.
- Access Cortana on your Windows computer.
- Then, type Printer in the search bar.
- Click the Printer and Scanners.
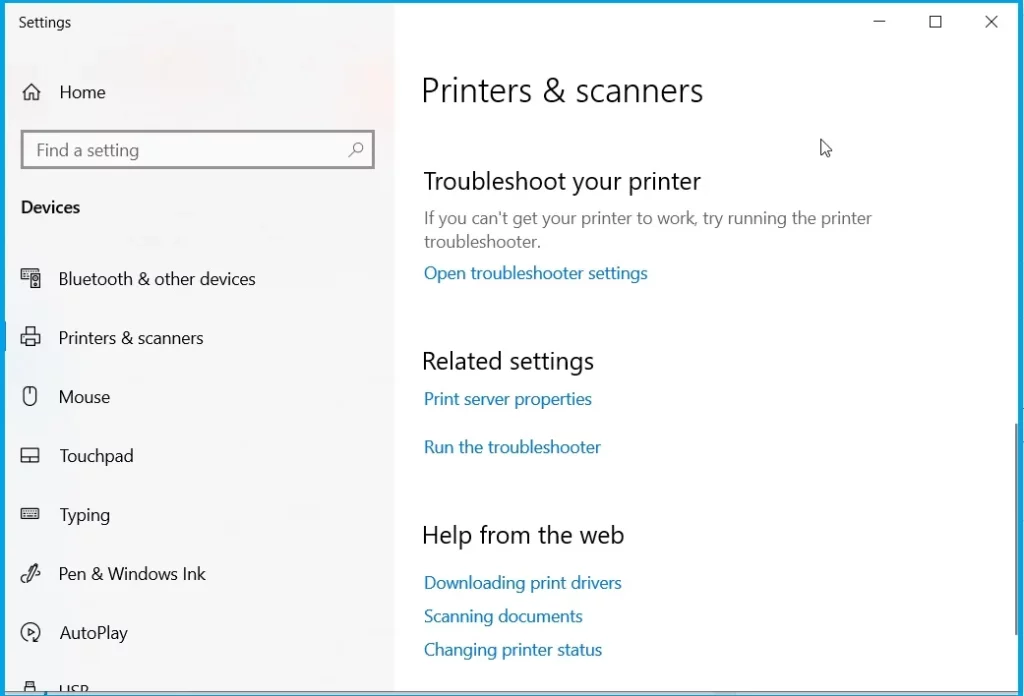
- Choose the Troubleshoot your printer option.
- Hit the Run the troubleshooter.
- Select the model of your printer from the available options.
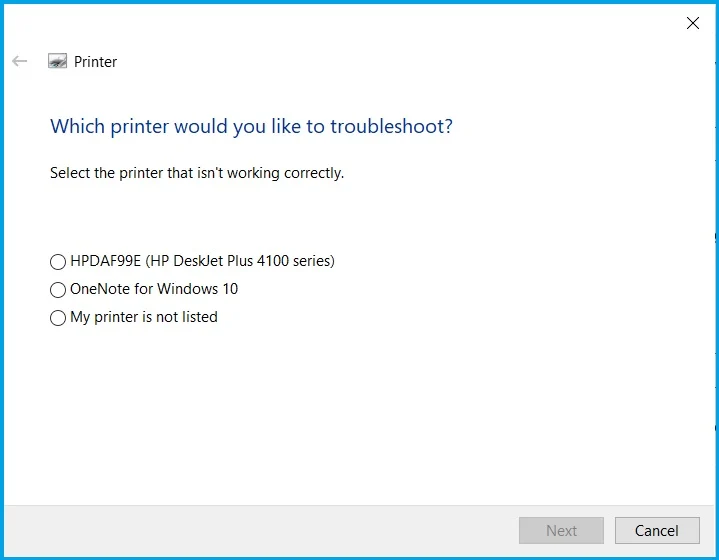
- Then, hit the Next button. By doing so, the troubleshooter starts performing.
You can wait for the scan. Once the process is finished, you can restart your computer and check if your printer is working fine. In case you are still facing issues related to the HP printer not printing black ink errors then move to another solution.
Solution 5: Use the HP print & scan doctor if the black ink not printing or not working
HP Print and Scan Doctor tool is designed to scan and resolve the error in your printer. If you have been facing black ink not printing or black ink not working HP error messages then running this tool will be helpful for you. All you need to do is download the tool and run it on your computer to fix printing issues.
- Download the HP print and scan doctor tool from the official HP website.
- Then, click on the downloaded file (HPPSdr.exe) to install the tool successfully on your Windows PC.
- Now, hit the Start button and select your printer.
- After pressing the Next button, you can click the Fix Printing option.
If you get a message stating that the error has been resolved, close the window and attempt the print job again. However, if it does not resolve the HP printer not printing black ink error then jump to the next fix.
Solution 6: Aligning the printhead
If you are concerned about why my HP printer is not printing black ink, the wrong alignment of the printhead could be the reason. To fix this problem, it is important to align the printhead. This can be done directly through the control panel of your printer.
- Most HP printers have this Align Printhead option on the control panel under the Printer Tools or Maintenance menus.
- By using the option, your printer can easily print the alignment page.
HP printer also provides guidelines for the printhead alignment for different models. If your HP printer not printing black ink clearly even after executing this method, switch to a different troubleshooting method.
Solution 7: Update the HP printer driver if the printer not printing black ink
HP printer not printing black ink error can be solved by the HP printer firmware update. To do so, you need to open the device management window, click right on your printer model, and update the drivers for your printer. Here are the steps for the same:
- Launch the Run command by using the Windows + R keys together.
- Then, type devmgmt.msc in the text field.
- When the Device Management screen displays, expand the Printers or Print Queue category by clicking the arrow.
- Now, click right on the HP printers in the printers category.
- Select the Change Drivers option from the menu.
- Click the Search button to update the driver.
Once the printer drivers are successfully installed on your computer, you will receive a confirmation message. Thereafter, you can restart the computer to reflect changes.
Solution 8: Turn On the command for printer color
Sometimes HP printer does not print black because you have applied the incorrect settings for your printer. Changing the printing preferences such as color can easily resolve the error and your printer can print in black. Let’s see how to do that:
- Click the Start menu.
- Then, open the Settings option.
- Select the Printers option.
- Now, click right on your printer’s icon and choose Properties.
- After this, select the Printing Preferences option.
- Once done, switch to the Paper/Quality tab.
- Click the Color button.
- Select OK.
Change print settings on HP printers for Windows
Change print settings on Mac for HP printers
As you have set the right preference for the printer color, you can attempt a print job to verify if the error has been resolved. As an alternate option, you can select the Grayscale printing option. This will also help you to fix the HP printer not printing black or black ink not working errors.
Solution 9: Clean the printhead using Window’s control panel
The printer requires cleaning periodically so your device doesn’t get affected by unexpected errors. To clean the printhead, you can open the control panel on your Windows system and clean the ink by selecting the hardware. Find out the detailed steps for this:
- Click the Start menu on your PC.
- Access Control Panel.
- Now, open the Drivers & Printers section.
- After this, click right on your printer’s icon.
- Click the Properties option.
- When a new window opens, select Hardware.
- Then, select Clean Ink.
Once you are done following these steps, you can complete the instructions displayed on your screen. Thereafter, check if the printer not printing black HP issue is still there.
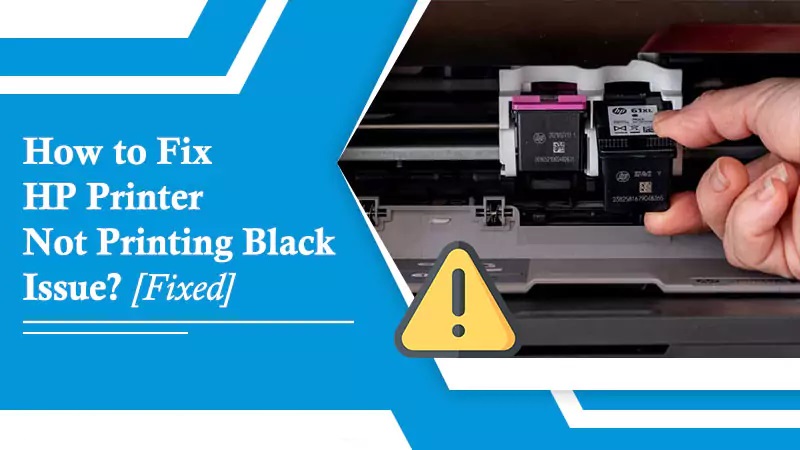
Solution 10: Replace the problematic cartridge to solve black ink not printing or not working
A problematic cartridge can create unexpected issues with your printer. Thus, it is important to identify a corrupted cartridge and replace it with a new one immediately. Pursue the following steps to replace the cartridge to fix the HP printer not printing black ink or black ink not working error:
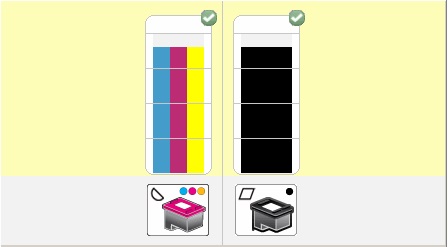
- To identify the cartridge, you can review a test page where you can check the color blocks and text.
- If you find any issue with the black text, it indicates the issue with your black cartridge.
- But, if the defect is found on the colored blocks then there is a problem with the tri-color cartridge.
Now that you have identified the defective ink cartridge, you can replace the same with a new one. Here are the steps:
- Put plain white paper in the tray.
- Then, turn on your HP printer using the Power button.
- Now, access the cartridge door and wait until your printer becomes silent and idle.
- After this, press down the cartridge. This will release the cartridge so you can take it out of the slot.
- Once done, make sure you prepare the new cartridge by removing the tape.
- At this moment, you have to hold the ink cartridge by the sides. Make sure the nozzles are facing toward your printer. Now, put the cartridge into the slot and make sure it snaps properly.
- Also, the icon of the ink cartridge should match the one you are installing. For instance, the tri-color cartridge should be on the left slot while the black one will go to the right.
- Push the ink cartridge into the slot.
Thereafter, you can close the ink cartridge door. Make sure you align the HP printer after installing the cartridges. Hence, it will resolve the HP printer black ink not printing issue.
Fix HP printer printing blurry text, wrong colors, or poor resolution copies
Bonus tip: Print in backup mode to solve HP printer does not print black color
If the print quality is not the concern and you want to print the documents immediately then printing in backup mode. In case you don’t have the replacement ink cartridge for HP Officejet Envy, Deskjet, or Photosmart printers, still you can print in backup mode.
All you have to do is remove your problematic ink cartridge and then print with the cartridge that is remaining. Please note that if you are removing the tri-color ink cartridge then your printout will result in grayscale. On the other hand, if you take out the photo or black ink cartridge then the product will print slowly. Also, the colors of your printouts may differ.
The document is for the HP Envy 4500, 4520, 5055, Deskjet 2600, 3520, 3630, Officejet 3830, 4650, 5255, OJ Pro 6978, 8600, 8710, and Photosmart 5520, 6520, 7520 series printers
- Fix HP Envy 4500, 4510, 4512, 4520, 5000, 5055, 5530, 5540, 5660, 7640 printer not printing black color properly.
- Resolve HP Deskjet 2130, 3520, 3755, 3630, 3700, 2600, 2620, 3830, 2652 printer black ink not printing or not working.
- Settle HP Officejet 3830, 4620, 4650, 5255, 5258, 6600, 8600, 4500, 4630 printer is not printing black ink clearly.
- Solve HP Photosmart 5510, 5520, 5525, 6510, 6520, 6525, 7510, 7520, 7525 printer not printing black ink.
- Sort out HP Officejet Pro 6830, 6960, 6968, 6970, 6975, 6978, 8600, 8610, 8620, 8710, 8720, 9010, 9015 printer black ink not printing or not working.